Struggling to get your products noticed in crowded retail stores? Your items get lost on the shelf, costing you valuable sales and brand recognition. It’s a constant battle for visibility.
PDQ trays1 and counter displays2 are your solution. PDQ trays1, also known as shelf-ready packaging3, are designed for quick stocking on shelves. Counter displays are placed in high-traffic areas like checkout counters to encourage impulse buys4. Both are crafted to grab customer attention right where it matters most.

I’ve seen firsthand how the right display can transform a product’s success. It’s not just about holding products; it’s about creating a mini-billboard on the shelf that tells your brand’s story. In this guide, I’ll walk you through everything you need to know about PDQ trays1 and counter displays2, from design to retailer compliance5. We’ll explore how these tools can make your products fly off the shelves. Let’s get your brand the attention it deserves.
What Are PDQ Trays and Counter Displays?
Feeling lost in the world of retail jargon? Terms like "PDQ" and "counter display" get thrown around, leaving you to guess what they mean. Let me simplify it for you.
A PDQ (Pretty Darn Quick) tray is a pre-filled, ready-to-display unit, usually a cardboard tray or box. Store staff can simply open the shipping case and place the whole unit on the shelf. A counter display is a point-of-sale fixture placed on countertops or at checkout to drive impulse purchases.

PDQ trays1 and counter displays2 both aim to make your products more visible and accessible to customers. However, they serve different primary functions. PDQ trays1 are a form of shelf-ready packaging3 (SRP), designed to make stocking shelves faster and more efficient for retail staff. This is a huge time-saver and reduces labor costs. Counter displays, on the other hand, are all about location. Placed in high-traffic areas, they are perfect for smaller, impulse-buy items.
Here's a simple breakdown:
PDQ vs Counter Display Comparison Table
| Feature | PDQ Tray | Counter Display |
|---|---|---|
| Setup Time | Seconds | Minutes |
| Best For | Shelf placement | Checkout impulse |
| Retail Labor | Very low | Low |
| Custom Structure | Limited | High |
| Cost | Lower | Medium |
Essentially, PDQ trays1 are built for speed and efficiency in stocking, while counter displays2 are designed for high-impact, last-minute sales. At my company, Packwins, we specialize in designing both, ensuring they are not only eye-catching but also retailer-compliant and easy to execute.
When to Use PDQ Trays vs Counter Displays?
Wondering if a PDQ tray or a counter display is the right choice for your product? The decision can feel complicated, but it comes down to a few key factors. Let’s break it down.
The choice between a PDQ tray and a counter display depends on your product's size, price, and the purchasing behavior you want to encourage. PDQ trays1 are ideal for items sold from a shelf, while counter displays2 are perfect for triggering impulse buys4 at checkout.

I always advise my clients to think about the customer's journey. If your product is something a customer is likely to seek out in an aisle, a PDQ tray makes it easy for them to find and for the retailer to keep in stock. Think snacks, drinks, or everyday essentials. The "pretty darn quick" nature of these trays means your product is less likely to be out of stock.
If your product is a small, lower-priced item that someone might grab on a whim, a counter display is your best bet. Think lip balms, candies, or small gadgets. These displays capitalize on that "what the heck, I'll grab one" moment while a customer is waiting in line. The key is to make it an easy, quick decision. Items under $20 generally perform best in these displays.
Consider these points:
- Product Size & Weight: Smaller, lighter items work well in both, but larger or heavier products are better suited for sturdy PDQ trays1 on a shelf.
- Price Point: Lower-priced items are ideal for impulse-driven counter displays2.
- Purchase Intent: Is it a planned purchase or an impulse buy? PDQ trays1 serve planned purchases by ensuring availability, while counter displays2 are designed to create impulse buys4.
PDQ Trays for Fast Shelf Placement and Replenishment?
Are your products getting stuck in the backroom instead of on the sales floor? Retailers are constantly battling to keep shelves stocked, and your packaging can either help or hurt that process.
Retailers love "open-and-sell" packaging, also known as shelf-ready packaging3 (SRP) or PDQ trays1, because it dramatically reduces the time and labor needed to restock shelves. This efficiency means your product gets in front of customers faster.

I remember working with a beverage company that was struggling with out-of-stocks. Their products were shipped in standard cases, and retail employees had to unpack each bottle individually. It was time-consuming, and often, the back stock never made it to the shelf. We switched them to a custom PDQ tray. The new design allowed staff to simply tear off a perforated strip and place the entire tray on the shelf.
The results were immediate. Restocking time was cut by over 70%, and their out-of-stock rates plummeted. This is the power of designing with the retailer in mind. Here’s why retailers are increasingly demanding PDQ trays1:
- Labor Savings: Staff can replenish shelves in a single movement instead of handling individual items.
- Improved Stocking Speed: Faster replenishment means less time with empty shelves and more opportunities for sales.
- Brand Consistency: Your products are always displayed as intended, in a clean, organized, and branded tray.
- Better Inventory Management: Clear, organized displays make it easier for staff to see stock levels at a glance.
By making life easier for the retailer, you become a preferred partner, and your products get the shelf presence they need to succeed.
Counter Displays That Win at Checkout?
Is your product getting lost in the shuffle at the most critical point of sale? The checkout counter is prime real estate, but with limited space and high traffic, your display has to work hard.
To win at checkout, your counter display must be compact, visually appealing, and designed for impulse purchases. It needs to grab attention quickly and make the buying decision easy for a customer who is already in the process of paying.

I’ve seen many brands make the mistake of trying to cram too much information or too many products onto a small counter display. The result is clutter, which shoppers tend to ignore. An effective counter display should be the opposite: simple, organized, and focused.
Here are my top strategies for designing a winning counter display:
- Maximize Vertical Space: Use tiered racks or multi-level designs to showcase more products without taking up a large footprint. This keeps the display neat and organized.
- Focus on Impulse Items: Feature small, affordable products that don't require much thought. Think snacks, beverages, small electronics, or seasonal novelties.
- Clear and Simple Messaging: Use bold graphics and concise text. Highlight the price and one key benefit. The customer should be able to understand the offer in a single glance.
- Make it Easy to Shop: The display should be easy for customers to grab items from and simple for staff to restock. A well-designed display makes the product the star.
A well-executed counter display can turn waiting time into buying time, significantly boosting your average transaction value. It's your last chance to make a sale, so make it count.
Retailer Rules: Walmart, Target, and Grocery Checkout Requirements?
Think you can design one display and ship it to all retailers? Think again. Each retailer has its own specific set of rules and expectations, and failing to comply can get your display rejected.
Walmart, Target, and major grocery chains all have unique requirements for PDQ trays1 and counter displays2, focusing on everything from dimensions and materials to visual style. Understanding these differences is critical for getting your display approved and on the sales floor.

I’ve helped countless clients navigate these complex guidelines. For example, a brand wanted to use the same intricate counter display for both Walmart and Target. While Target appreciated the design-forward, storytelling aspect, Walmart rejected it for being too complex and not fitting their "Everyday Low Price" aesthetic. We had to create a second, more streamlined version for Walmart that focused on stability and a clean footprint.
Here is a snapshot of what to expect:
Retail Compliance Snapshot
| Retailer | Key PDQ / Counter Rules |
|---|---|
| Walmart | Stability, specific footprint dimensions, and a preference for PDQ-ready formats to save labor are key. Displays must be sturdy and often require ISTA testing for heavier products. |
| Target | Visual appeal and clean design are paramount. Displays need to align with their brand aesthetic, which is more design-forward. They have strict guidelines on everything from fixture types to sustainability. |
| Grocery | Speed and ease of refill are critical due to high SKU rotation. Lightweight PDQs for impulse categories like snacks and candy are common. The focus is on efficiency and keeping shelves looking full. |
Navigating these requirements can be daunting, but it’s a necessary part of the process. At Packwins, we have extensive experience designing displays that meet the specific guidelines of major retailers, ensuring a smooth path from concept to execution.
Corrugated Material Selection for PDQ and Counter Displays?
Choosing the right material for your display feels like a balancing act, doesn't it? You need it to be strong enough to hold your products, but you also have to watch your budget and timeline.
The key is to select a corrugated material6 based on your product's weight and the display's intended lifespan. This choice directly impacts strength, cost, and even the speed of manufacturing. A mismatch can lead to a collapsed display or unnecessary expenses.

I once had a client who wanted to use the thinnest possible material for a PDQ tray holding glass bottles to save money. I advised against it, explaining the risk of collapse during shipping or on the shelf. We ran a few tests and found that a slightly thicker B-flute provided the necessary strength without significantly increasing the cost. That small change saved them from a potentially disastrous product launch.
The strength of corrugated cardboard comes from the "flute," the wavy layer of paper between the liner sheets. Different flute profiles7 offer different levels of strength and printability.
Here’s a simple guide to help you choose:
Corrugated Material Selection Table
| Product Weight | Recommended Flute |
|---|---|
| Light (<3kg) | E-flute: Thin profile, excellent for high-quality printing. |
| Medium (3–8kg) | B-flute: Good balance of strength and a smooth printing surface. |
| Heavy (8kg+) | C-flute / Double Wall: Offers greater strength and durability for heavier items. |
Here's a quick rundown of the trade-offs:
- Strength: Thicker flutes (like C-flute) and double-wall board provide more support for heavy products.
- Cost: Generally, the more material used (thicker flutes, double wall), the higher the cost.
- Speed: Simpler, more common materials can often be sourced and produced faster.
- Print Quality: Thinner flutes like E-flute offer a smoother surface, which is better for detailed graphics.
Choosing the right material from the start is a critical step in creating a successful and cost-effective display.
Cost Breakdown: What PDQ Trays and Counter Displays Really Cost?
Worried about the cost of a custom display? It’s a common concern, but the price isn't arbitrary. Understanding the factors that drive the cost can help you make smart decisions for your budget.
The final cost of a PDQ tray or counter display is determined by several key factors: design complexity8, material, size, print quality, and order quantity. A simple, one-color tray will cost significantly less than a large, multi-tiered display with full-color graphics.

I often tell my clients that the biggest factor in the per-unit price is quantity. This is because of the setup costs involved in printing and die-cutting. Whether you make 100 displays or 1,000, the initial setup cost is similar. When you spread that cost over a larger run, the price per display drops dramatically.
For example, a single, complex counter display might cost $75. But if you order 500 of them, the price could fall to $15 per unit. This is the power of economies of scale9.
Here are the main cost drivers to consider:
- Design and Structure: More complex designs with unique shapes, multiple tiers, or intricate cutouts require more engineering and tooling, which increases the cost.
- Material: The type and thickness of the corrugated board impact the price. Heavier, more durable materials cost more.
- Printing and Finishes: High-resolution, full-color printing is more expensive than simple one or two-color jobs. Finishes like glossy coatings or laminates also add to the cost.
- Size: Larger displays simply use more material, which increases both material and shipping costs.
- Quantity: As mentioned, larger order quantities significantly reduce the per-unit cost.
By understanding these elements, you can work with a partner like Packwins to design a display that meets both your marketing goals and your budget.
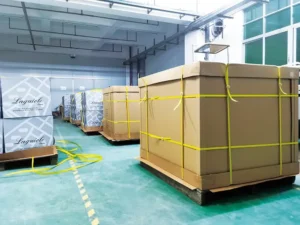
From Factory to Store: Pack-Out, Labeling, and Compliance?
Designed the perfect display? That's a great start, but your job isn't done. The logistics of getting that display from the factory to the retail floor10 can make or break your campaign.
Logistics planning is just as important as the design itself. Proper pack-out, correct labeling, and ensuring retailer compliance are crucial steps that prevent delays, rejections, and lost sales opportunities.

I learned this lesson the hard way early in my career. We had designed a fantastic floor display for a major retailer. The design was approved, production went smoothly, but we overlooked one small detail in the retailer's shipping guidelines. The displays arrived at the distribution center without the correct labels. The result? The entire shipment was rejected, and we missed the first two weeks of a major promotion.
It was a costly mistake, but one I never forgot. Now, I obsess over the logistical details with my clients. Here's what you need to focus on:
- Pack-Out (Kitting and Assembly): This is the process of assembling the display and packing it with your product. Many retailers prefer displays that arrive pre-packed and ready to be placed directly on the sales floor. This is highly valued for its efficiency.
- Labeling: Retailers have very specific requirements for shipping labels. These labels contain crucial information for their distribution centers. Incorrect labeling is a common reason for shipments being rejected.
- Compliance and Distribution: Your displays must be robust enough to survive shipping. It's also critical that they arrive within the retailer's specified delivery window. Arriving too early or too late can cause major problems.
Partnering with an expert who understands the entire supply chain, from design to final placement, is key to a successful and stress-free retail launch.
Conclusion
In short, PDQ trays and counter displays are powerful tools to boost your product's visibility and drive sales. Focus on designing with the retailer's efficiency and the customer's experience in mind.
PDQ trays streamline shelf stocking, saving time and labor costs, making them a valuable asset for retailers. ↩
Counter displays are strategically placed to encourage last-minute purchases, increasing sales and customer engagement. ↩
Shelf-ready packaging simplifies stocking, reduces labor costs, and ensures products are displayed consistently. ↩
Impulse buys are driven by strategic placement and appealing displays, boosting sales at checkout counters. ↩
Understanding retailer compliance ensures displays meet specific guidelines, preventing rejection and ensuring smooth execution. ↩
Corrugated material offers strength and cost-effectiveness, essential for durable and budget-friendly displays. ↩
Choosing the right flute profile ensures displays are strong enough to hold products without unnecessary costs. ↩
Complex designs require more engineering and tooling, increasing costs but potentially enhancing visual impact. ↩
Ordering larger quantities reduces per-unit costs, making displays more affordable and maximizing budget efficiency. ↩
Navigating logistics from factory to retail floor is crucial for ensuring displays arrive intact and ready for use. ↩